After a flood, your biggest risk isn’t just mold; it’s losing control of the repair process to contractors who may not have your best interests at heart.
- The insurer’s builder is often paid to control costs for the insurance company, creating a fundamental conflict of interest with your goal of a perfect restoration.
- Decisions on drying vs. stripping out materials must be driven by moisture data and technical standards (like a drying certificate), not just visual inspection or cost-saving pressures.
Recommendation: Treat the restoration like a professional project manager: question everything, demand written specifications (like a Schedule of Works), and use financial milestones to enforce quality.
Watching contractors enter your flood-damaged home, armed with crowbars and sledgehammers, is a uniquely stressful experience. The immediate question on your mind is often a battle between two competing fears: « Are they doing enough to prevent future problems like mold? » versus « Are they tearing out perfectly good walls and floors, causing more chaos and cost than necessary? » This is the core dilemma of ‘drying out’ versus ‘stripping out’. While many will tell you it’s a simple choice, the reality is far more complex.
The truth that most contractors won’t tell you is that the decision isn’t purely technical; it’s also financial and often driven by the interests of the insurance company. As a disaster restoration specialist, I can tell you that your home’s successful recovery depends less on the initial choice to dry or strip, and more on your ability to take control of the entire restoration process. You need to understand the rules of the game, the technical benchmarks, and the financial levers that truly dictate the quality of the final repair.
This isn’t about becoming a construction expert overnight. It’s about learning to ask the right questions, demand the right documents, and manage your contractors—whether they are appointed by your insurer or chosen by you. The goal is to shift from being a passive, anxious observer to an informed, empowered project owner who ensures the job is done right. This guide will walk you through the critical control points of a major home restoration, from managing contractors and costs to understanding the paperwork that protects you.
To help you navigate the complexities of post-flood restoration, this article is structured around the key challenges and decision points you will face. Follow this guide to understand your rights, manage the process effectively, and ensure a successful outcome for your home.
Summary: A Homeowner’s Guide to Managing Post-Flood Restoration
- Three Quotes: Why You Should Get Your Own Estimates vs Using the Insurer’s Builder?
- Dehumidifier Costs: Who Pays for the Electricity to Dry Your Home for 4 Weeks?
- Snagging the Repairs: What to Do if the Insurer’s Builder Does a Bad Job?
- Asbestos in Artex: How Hazardous Material Removal Impacts Your Claim Limit?
- Betterment during Repair: Can You Pay Extra to Upgrade the Kitchen While They Fix It?
- How to Dry Out a Flooded House Without Causing Secondary Rot?
- The Drying Certificate: Why You Cannot Re-Decorate Until the Wall Is Dry?
- The Schedule of Works: Managing the Chaos of a Major Home Restoration?
Three Quotes: Why You Should Get Your Own Estimates vs Using the Insurer’s Builder?
When your insurer offers to send their « approved » builder, it can feel like a relief. It simplifies the process, and you assume they’ve been vetted. However, it’s crucial to understand the inherent conflict of interest at play. The insurer’s primary goal is to manage the claim’s cost, and their appointed builder’s business model often depends on satisfying the insurer, not necessarily you. Their scope of work may be tailored to meet a budget, potentially overlooking elements that a truly independent contractor would deem essential for a quality restoration.
Getting your own estimates from independent, certified restoration contractors is not just about comparing prices; it’s about getting an unbiased assessment of the damage and a comprehensive scope of work designed to restore your home properly. An independent contractor works for you. Their allegiance is to the quality of the outcome, not to the insurer’s budget constraints. This independent scope of work becomes a powerful negotiation tool with the loss adjuster, ensuring that the final agreed repairs are based on a thorough and homeowner-focused assessment.
Case Study: The Structural Conflict of Interest
Industry analysis reveals a structural tension in flood restoration. Insurers often push toward drying-in-place strategies to minimize demolition and rebuild costs. In contrast, independent restoration professionals might recommend more aggressive material removal to completely eliminate risks from contaminated floodwater (Category 3). This decision represents not just a technical judgment but a fundamental allegiance question. The insurer’s appointed contractor’s primary obligation is cost control for their client (the insurance company), whereas an independent contractor you hire works to deliver quality outcomes for you, with decisions guided by your interests.
Even if you ultimately decide to use the insurer’s builder, having your own detailed quotes provides a critical benchmark for the scope and quality of the work. It gives you the leverage to insist that necessary steps are included and that corners are not cut. Restoration control begins with establishing an independent, expert-backed vision for your home’s recovery, free from the insurer’s cost-minimizing influence.
Dehumidifier Costs: Who Pays for the Electricity to Dry Your Home for 4 Weeks?
After a flood, your home may be filled with industrial dehumidifiers and air movers running 24/7 for weeks. The noise is a constant reminder of the situation, but a surprise often arrives a month later: a shockingly high electricity bill. Many homeowners assume this is just another unfortunate cost they must bear. This is a mistake. The electricity used by drying equipment is a direct cost of mitigating your covered loss and is almost always a reclaimable expense under your insurance policy, typically falling under ‘Additional Living Expenses’ or mitigation costs.
However, you cannot simply submit your utility bill and expect payment. Insurers require proof. It is your responsibility to document this specific cost meticulously. Failure to do so will likely result in the insurer rejecting the claim. This is a classic example where proactive documentation gives you financial leverage. You must build an « evidence pack » to justify the reimbursement.
The process can seem daunting, but it is straightforward if you start from day one. Take photos of equipment nameplates to document their power draw (amp or watt rating). Keep a log of how many pieces of equipment are running and for how long. Restoration industry calculations show that drying jobs can be very energy-intensive, with costs exceeding $400 for extended drying jobs lasting 7-10 days. By presenting a detailed file with baseline bills, equipment specs, and meter readings, you transform a vague request into an undeniable, data-backed claim for reimbursement.
Snagging the Repairs: What to Do if the Insurer’s Builder Does a Bad Job?
The restoration work is finally « complete. » The builders pack up, and you’re left to put your life back together. But as you look closer, you notice issues: a misaligned door, sloppy paintwork, or floor tiles that aren’t quite level. This is known as « snagging, » and it’s a critical final step in taking back control of your home. It’s particularly important when dealing with an insurer’s appointed builder, as your leverage can feel limited. If the work is substandard, you are not obligated to accept it.
The key is to be systematic and create a paper trail. Do not rely on verbal agreements. Walk through every room and create a detailed « snagging list, » complete with time-stamped photos and videos of every defect, no matter how small. Cross-reference this list against the original ‘Schedule of Works’ to show where the execution failed to meet the specification. Send this list formally via email to both the builder’s project manager and your insurance company’s loss adjuster, requesting rectification within a reasonable timeframe (e.g., 14 days).
If the builder or insurer is unresponsive, you must escalate. Most insurers are required to provide a final written response to formal complaints within a set period; in the UK, for instance, this is 8 weeks. If they fail to resolve the issue, you can take your documented case to a regulatory body. In the UK, this is the Financial Ombudsman Service (FOS), which can compel insurers to rectify poor workmanship from their appointed contractors. Check for an equivalent consumer protection or insurance arbitration body in your region. Your meticulously documented snagging list is your primary weapon in this process.
Asbestos in Artex: How Hazardous Material Removal Impacts Your Claim Limit?
Discovering asbestos during a flood restoration is a homeowner’s nightmare. Often found in materials like textured ceilings (Artex), old vinyl tiles, or pipe insulation, its presence can stop a project in its tracks and introduce significant costs. A common fear is that your insurance won’t cover it, especially if it was a pre-existing condition. However, the situation is more nuanced, and this is where understanding the concept of « consequential damage » is vital.
If the asbestos-containing material (ACM) was stable and undisturbed before the flood, its removal is typically considered routine maintenance and not covered. But if the covered peril—the flood—disturbs or damages the ACM, the situation changes. The necessary and legally required hazardous material remediation can be argued as a consequential damage of the initial insured event. The cost to safely contain, remove, and dispose of the asbestos, as well as the expanded reconstruction work required as a result, should be part of the claim.
Case Study: Asbestos as Consequential Damage
When flood damage disturbs materials like Artex ceilings, the claim shifts from simple water damage to a hazardous material scenario. The critical argument is that the asbestos removal itself becomes ‘consequential damage.’ The process requires creating containment zones and often removing entire ceiling or wall sections, necessitating far more repair work than the original flood scope. This additional reconstruction should be covered by the insurer as an unavoidable result of properly remediating the covered peril, not as a separate expense.
It’s important to check your policy’s specific limits. Many policies have sub-limits for asbestos remediation, with some specialized homeowners insurance policies offering up to $10,000 in coverage for removal resulting from a covered loss. Immediately notify your insurer and ensure a certified asbestos specialist handles the assessment and removal. Do not allow a general contractor to handle or dispose of ACMs.
Betterment during Repair: Can You Pay Extra to Upgrade the Kitchen While They Fix It?
A major restoration can present a unique, albeit stressful, opportunity. With the kitchen already stripped out due to flood damage, it’s tempting to think, « Why not put in that quartz countertop I’ve always wanted instead of the old laminate? » This concept is known as « betterment. » You can absolutely do it, but you must manage the process with extreme care to protect yourself financially. Insurers will only pay to restore your home to its pre-loss condition—a « like-for-like » replacement. The additional cost of any upgrade is your responsibility.
The biggest risk is blurring the lines between the insured repairs and your private upgrades. This can lead to disputes where the insurer refuses to pay their share, or you end up subsidizing the basic repair. The solution is to create a « contractual firewall. » Insist that the builder creates two separate, legally distinct contracts. Contract A covers only the insurance-approved, like-for-like restoration, to be paid by the insurer. Contract B is a private agreement between you and the builder for the upgrade portion, paid entirely by you.
Before signing anything, you must get the insurer’s « like-for-like » allowance in writing. This document should specify the exact materials and quality level they will cover (e.g., « £50 per square meter for flooring, » « laminate countertops, » « builder-grade cabinets »). This figure is your baseline. The total cost of your upgraded work minus this written allowance equals your out-of-pocket contribution. This clarity prevents any ambiguity and ensures the insurer cannot later dispute their liability, giving you full control over the upgrade without jeopardizing your core claim.
How to Dry Out a Flooded House Without Causing Secondary Rot?
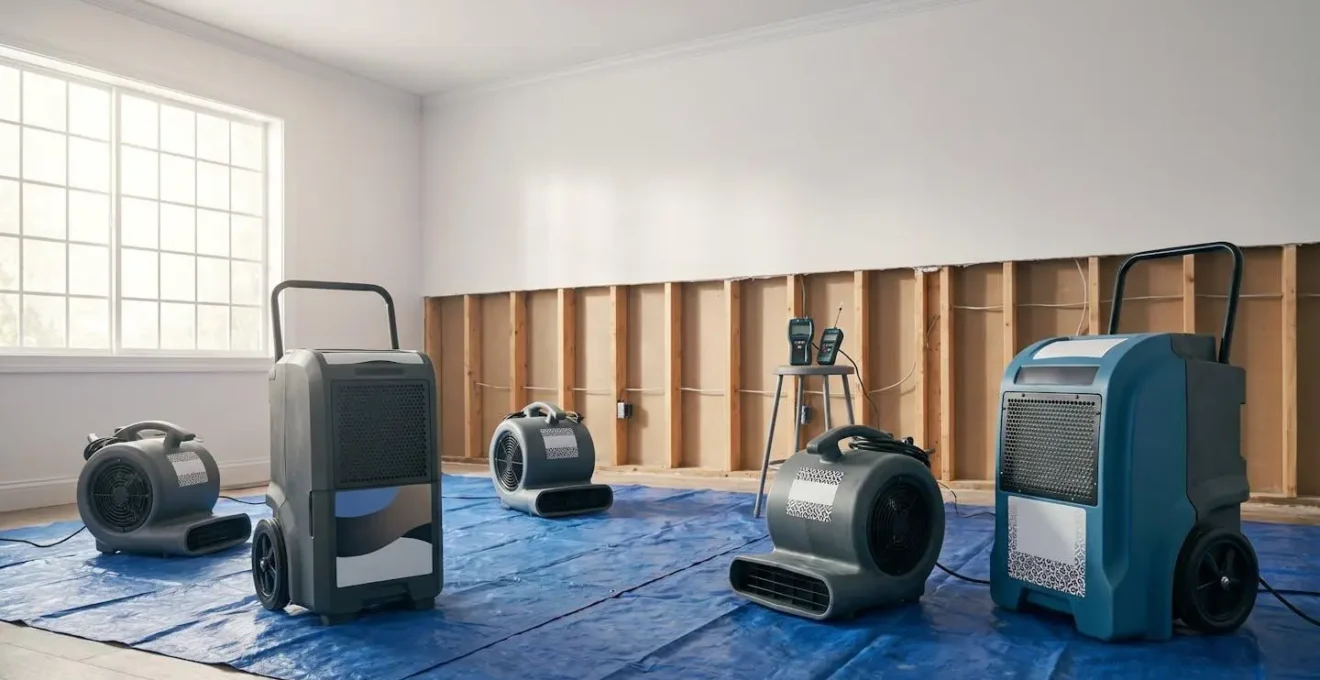
The primary goal after a flood is to dry everything out as fast as possible. The urgency is real; professional flood restoration protocols state mold growth can begin within 24-48 hours. However, speed without precision is dangerous. The greatest risk in the drying process isn’t visible water; it’s the hidden moisture trapped inside wall cavities, under floors, and within structural timbers. Using dehumidifiers to dry the air in a room while a wall cavity remains saturated is a recipe for disaster. It creates a perfect breeding ground for dry rot, mold, and long-term structural decay that may not be apparent for months or even years.
A professional restoration company doesn’t just dry the air; they achieve « technical justification » for dryness. This involves a systematic process of psychrometric drying, where temperature, humidity, and airflow are carefully controlled to maximize moisture removal from materials. Crucially, it relies on constant monitoring with specialized tools. Contractors must use probe moisture meters to measure deep within wall assemblies and non-invasive meters to map moisture across all surfaces. They are not just drying the house; they are hunting for hidden moisture pockets.
As the homeowner, your role is to ensure this deep monitoring happens. Question your contractor about their process for checking hidden areas. Ask to see the moisture map and daily drying logs. These documents show the progress of moisture reduction in specific structural elements, not just the ambient air. True drying is complete only when the materials themselves have returned to a safe, pre-loss moisture content, preventing the devastating consequences of secondary rot.
Your Action Plan: Hidden Void Moisture Monitoring Checklist
- Sub-floor cavities and crawlspaces: Ensure contractors use moisture meters to take readings from underneath flooring (not just the surface), and consider injection drying systems if passive dehumidification cannot reach these enclosed spaces.
- Wall cavities between studs: Verify that contractors are drilling small inspection holes and using probe moisture meters to measure deep within wall assemblies, particularly at the base where water accumulates.
- Ceiling cavities and attic spaces: Confirm moisture mapping includes readings from above ceiling drywall where insulation may trap moisture, and ensure adequate ventilation or air mover placement to address these areas.
- Behind fixed kitchen and bathroom units: Request specific inspection of areas behind cabinets, vanities, and built-in appliances where trapped moisture can cause long-term, undetected rot.
- Within structural timber members: For severe flooding, ensure deep-penetration moisture meters are used on load-bearing beams and joists, as these require the longest drying times and pose structural risks if rushed.
The Drying Certificate: Why You Cannot Re-Decorate Until the Wall Is Dry?
After weeks of disruption, the desire to start re-decorating and reclaim your space is immense. The moment the dehumidifiers are switched off, it’s tempting to break out the paintbrushes. This would be a critical error. A room feeling dry to the touch is not the same as a structure being certifiably dry. Painting or laying new flooring over a wall or subfloor that still contains residual moisture is guaranteed to fail. The trapped moisture will cause paint to blister, wallpaper to peel, and new wood floors to warp and cup.
This is why the « Drying Certificate » (or Certificate of Dryness) is one of the most important documents in your entire restoration project. It is not a mere formality. It is the formal, data-backed conclusion of the drying process, issued by the restoration company. It serves as forensic evidence that all affected structural materials—wood studs, concrete, plaster—have reached their « drying goal, » a pre-defined moisture content level that is considered safe for reconstruction. Timelines can vary, but IICRC-certified restoration timelines suggest 3-7 days for initial drying, with repairs taking weeks longer.
The Drying Certificate as a Warranty Shield
The drying certificate is a multi-faceted protection document. It proves to your insurer that mitigation was completed to professional standards (typically IICRC S500), justifying the claim closure. It protects you by providing proof of due diligence if mold issues arise in the future. Most importantly, it serves as a warranty shield for all subsequent work. A flooring installer can’t be blamed for a warped floor if the certificate proves the subfloor was dry at installation. A decorator’s work is protected. It is the technical handover that allows all subsequent trades to proceed with confidence, knowing their work is being applied to a stable and suitable substrate.
Never allow any re-decoration or reconstruction to begin before you have a copy of this certificate. It is your ultimate assurance that the « strip out vs. dry out » phase is truly complete and that your home is ready for a lasting and durable repair. It is the final word in technical justification.
Key Takeaways
- Your primary role after a flood is not as a victim but as a project manager, actively controlling the restoration process.
- Decisions must be based on data (moisture readings, written quotes, schedules of work), not assumptions or verbal assurances.
- Use financial levers and contractual firewalls (like separate contracts for betterment) to maintain control and protect your interests.
The Schedule of Works: Managing the Chaos of a Major Home Restoration?
Of all the documents you will encounter, the « Schedule of Works » is your single most powerful tool for restoration control. Provided by the contractor, this document details every single task to be performed, from demolition to the final coat of paint. In the hands of an unprepared homeowner, it’s a confusing technical document. In the hands of an informed homeowner, it is the blueprint for the entire project and the primary mechanism for quality and financial control.
You must scrutinize this document before any work begins. Do not be intimidated by jargon. Your job is to look for vagueness and ambiguity, as these are where costs can spiral and quality can suffer. Challenge generic phrases like « make good walls » and demand specifics: « remove plaster to 1m height, apply antimicrobial treatment, install 12.5mm moisture-resistant plasterboard, tape and joint to a Level 4 finish, prime, and apply two coats of emulsion. » A detailed schedule removes ambiguity and makes the builder accountable for a specific standard of work.
Using the Schedule for Payment Control
The Schedule of Works can be transformed from a simple to-do list into your primary financial control mechanism. Work with your insurer and contractor to establish a payment milestone schedule linked directly to the completion of major sections in the schedule. For instance, release a percentage of funds only upon verified completion of specific stages: 20% after demolition and receipt of the drying certificate, 30% after structural repairs are signed off, 30% upon completion of all finishing work, and a final 20% retention held until every item on your final snagging list is rectified to your satisfaction. This approach links payment directly to performance, giving you the ultimate financial lever to ensure quality.
Treat the Schedule of Works as a binding contract. Every line item represents a promise. By reading it critically and linking payments to its completion, you move from managing chaos to executing a well-defined plan, ensuring the restoration meets the exact standards your home deserves.
By applying these principles of control, documentation, and technical justification, you can navigate the complex post-flood restoration process. Taking an active role ensures your home is not just repaired, but restored correctly, safely, and to the standard you deserve. For a personalized assessment of your situation, the next logical step is to consult with an independent restoration professional.